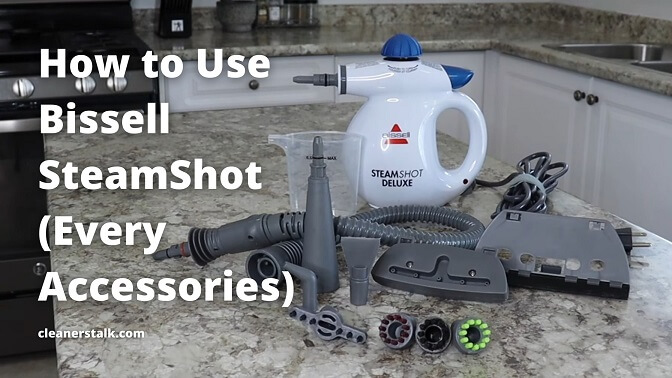
How to Use Bissell SteamShot (All of the Accessories)
Cleaners Talk is reader-supported. This post contains affiliate links, we may earn a commission at no additional costs to you. As an Amazon Associate we earn from qualifying purchases.
The Bissell SteamShot is a small and compact handheld steamer. It offers 100 watts of steaming power that eliminates 99.9% of germs and bacteria from a variety of hard surfaces.
If this is your first time using the steamer, please learn how to use the Bissell SteamShot and its attachments.
How to Use Bissell SteamShot (Beginner-Friendly Guide)
The Bissell SteamShot has a 16-foot cord that allows you to move around your house as you are steam cleaning. It is enough length to use the steamer without plugging and unplugging the machine.
The Bissell SteamShot also comes with an on-demand steam trigger which allows you to control the amount of high-pressure, high-temperature steam. Before learning how to use it, please get to know the accessories.
Getting to know the Bissell SteamShot accessories
A Bissell SteamShot comes with 9 accessories. However, the accessories included vary by model (Bissell SteamShot Deluxe has more tools). Here’s the list of all the included accessories:
1. Measuring cup
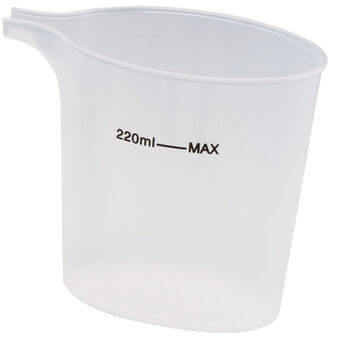
The cup helps you fill the water tank. It measures 6.6oz of water (water tank's maximum capacity).
2. Extension hose
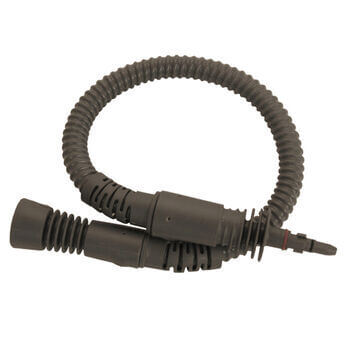
The extension hose is for cleaning hard to reach areas. Attach the extension hose to the unit and use it with the accessory nozzle attached.
3. Accessory nozzle
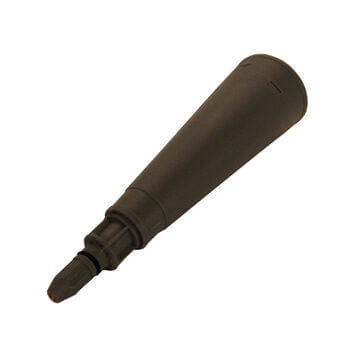
The accessory nozzle can be used alone or with other tools.
Attach the accessory nozzle to the unit or the extension hose. The accessory nozzle can be attached directly to the steamer or the end of the extension hose.
4. Detail brush tool (3)
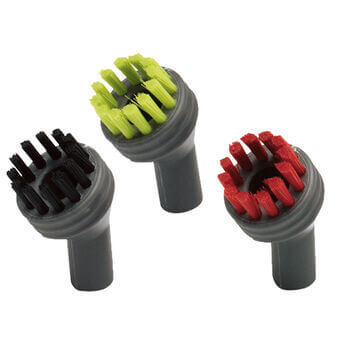
Attach the detail brush tool to the end of the accessory nozzle for scrubbing stubborn soil. There are three detail brushes that are color-coded (red, green, and black).
5. Flat scraping tool
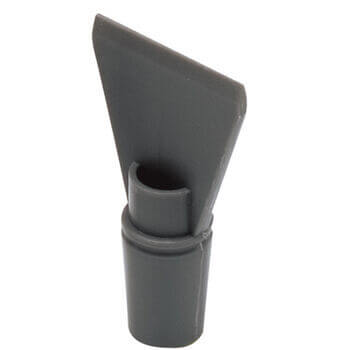
Attach the flat scraping tool to the end of accessory nozzle for removing sticky messes or wallpaper.
6. Angle concentrator tool
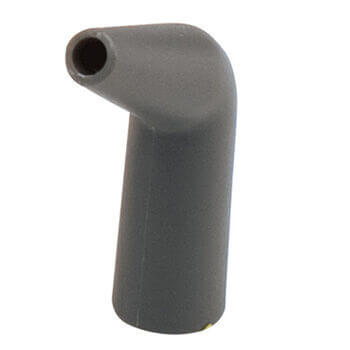
Attach the angle concentrator tool to the end of the accessory nozzle. It delivers steam with precision.
7. Grout brush tool
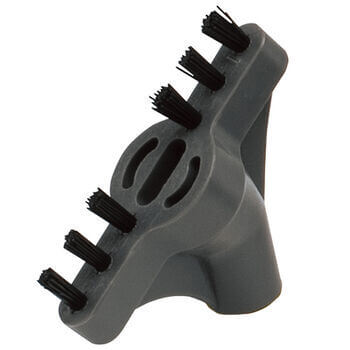
Attach the grout brush tool to the end of the accessory nozzle for scrubbing small cracks and crevices.
8. Fabric steamer tool
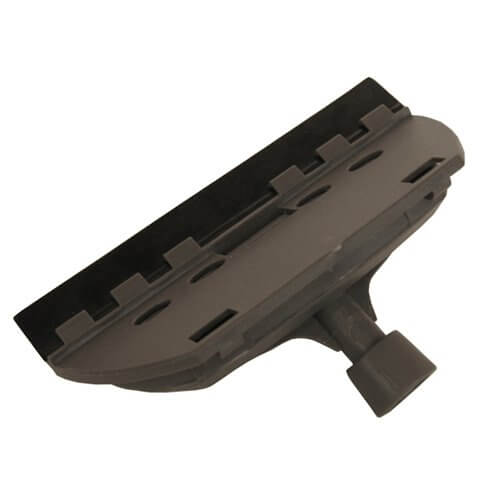
Attach the fabric steamer tool to the end of the accessory nozzle for refreshing and removing wrinkles on clothing or drapes. Attach the cloth over the tool before using.
9. Window squeegee tool

The window squeegee tool hooks onto the fabric steamer tool (without cloth).
1. Preparing the Bissell SteamShot (filling the tank)
Before using the Bissell SteamShot, you need to fill the tank with water and plug in the steamer. You can use tap water instead of filtered water. However, if your tap water contains a high level of mineral content (hard water), it is recommended to use distilled or demineralized water.
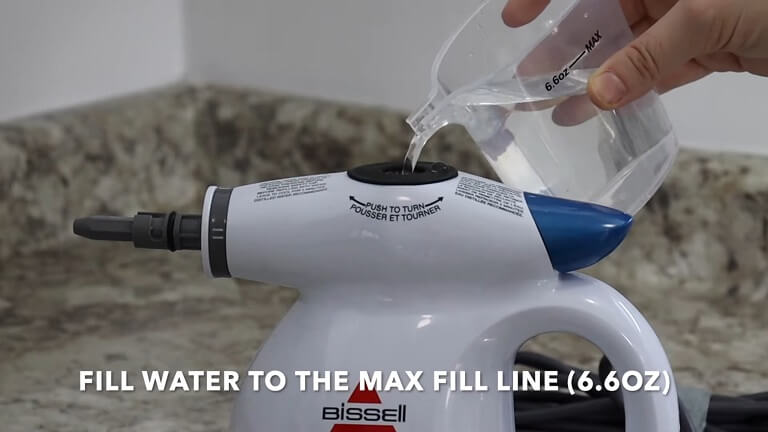
Here’s how to fill (or refill) the Bissell SteamShot with water:
- Push down on the safety cap while turning counter clockwise.
- Fill the measuring cup to the max fill line (6.6oz).
- Slowly pour water into the steamer.
- Replace the safety cap by pushing it down while turning clockwise.
Do not add anything except cool water or you will cause damage to the heating element. Adding anything else other than cold water will also void your warranty. Always unplug the steamer before filling/refilling.
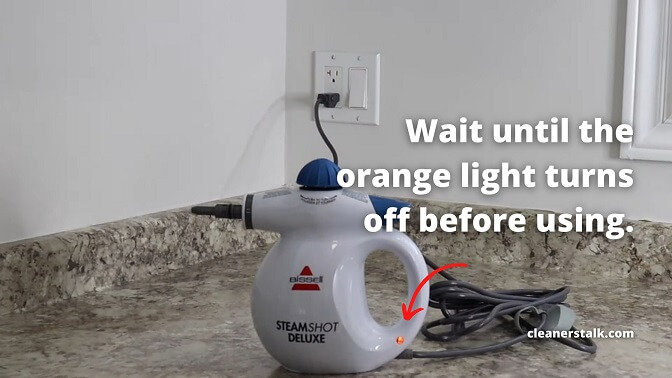
Once the water tank has been filled, plug in the Bissell SteamShot into an electrical outlet. A small orange light will illuminate on the bottom of the handle. This means that the Bissell SteamShot is building up pressure and heating up the water inside the tank.
After about 30 seconds, the light will turn off. This means the Bissell SteamShot is ready to use.
2. Using the accessory nozzle
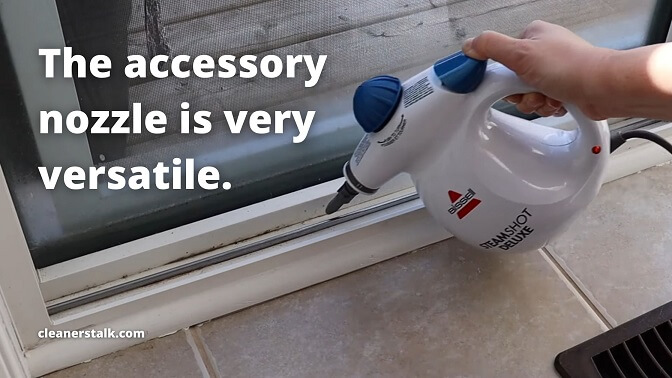
The accessory nozzle is the most basic tool in the Bissell SteamShot arsenal. It can be used on its own or combined together with another tool. All you have to do is to attach it to the steamer.
Using the accessory nozzle is pretty straightforward. Direct the nozzle to an object or an area. The accessory nozzle is great for cleaning window frames as well as fabric, upholstery, or children’s toys.
3. Using the extension hose
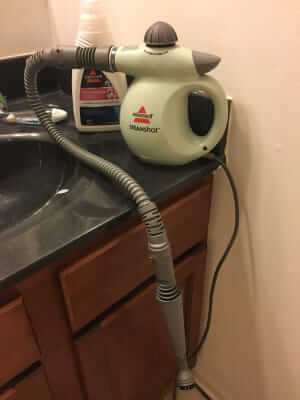
The extension hose adds more length to the Bissell SteamShot steamer and is designed to direct steam into hard-to-reach areas. It is perfect to clean nooks and crannies.
The extension hose is very easy to attach to the Bissell SteamShot. Align the arrow on the extension hose with the lines on the steamer. Once it clicks into place, give it a twist and it’s ready to go.
Important: The Bissell SteamShot has no indicator that tells you how much water is inside the tank. As you’re cleaning (especially during a long period of time), you will notice the steamer will stop releasing a lot of high pressure steam, which indicates that you have to refill the water tank.
4. Using the grout brush tool
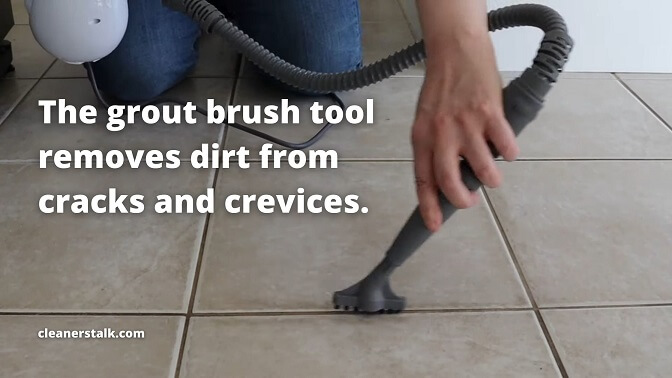
To use the grout brush tool, attach it to the end of the accessory nozzle. You can also combine the grout brush tool with the extension hose to make it easier to use. Move the grout brush back and forth along grout lines.
As you move the grout brush along the grout lines, press the on-demand trigger on the Bissell SteamShot, which will give you blasts of steam that helps to loosen the dirt from the grout lines.
The great thing about the on-demand trigger is that you get to control how much steam to use. After a couple of strokes, you can slowly see all the dirt getting blasted out of the grout lines and on the perimeter of the tile.
Once the dirt has been loosened from the grout lines, wipe them clean with a microfiber cloth.
Important: If you are using the Bissell SteamShot for a long period of time, you may notice the orange light flicker as you’re cleaning. This is okay. The flickering means that the steamer is building the pressure back up and reheating the water inside the water tank. It only takes a second or two to reheat the water.
5. Using the window squeegee tool
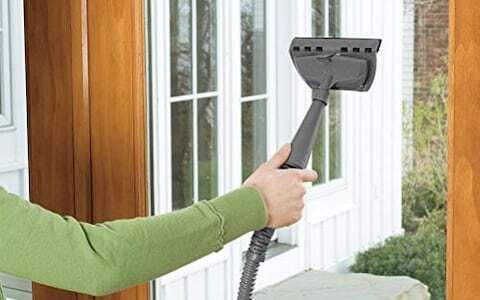
Designed to clean glass and windows, the squeegee tool is an important tool in the Bissell SteamShot arsenal. To use the window squeegee tool, you will need to attach it to the fabric steamer tool (without the cloth).
You can also use the window squeegee tool together with the extension hose. This gives you more length and reach as you clean harder-to-reach windows and glass shower stalls in your house.
To use the window squeegee tool, swipe the window squeegee tool on the surface of a glass or window while pressing the on-demand trigger to release a continuous stream of steam.
The window squeegee tool works great to remove hard water deposits from glass shower stalls, as well as cleaning and sanitizing dirty windows around the house.
6. Using the detail brush tool (color-coded)
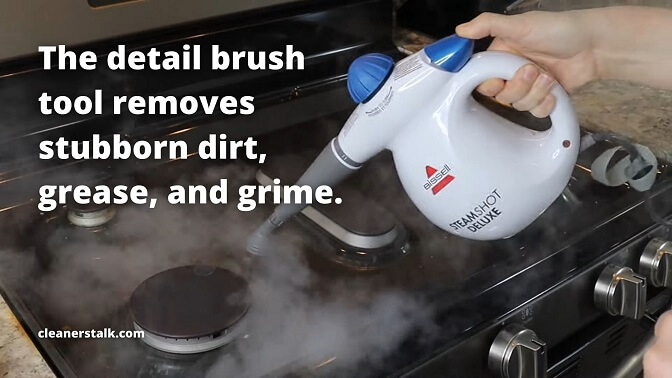
The Bissell SteamShot comes with three detail brushes that are color-coded (red, green, and black). Use the color-coding system to remember which areas you use the brushes in. This allows you to use each brush in different parts of your home without getting them mixed up.
For example, you can use one of the brushes for the kitchen, one for the bathroom, and one for the garage. This prevents any cross-contamination around your house whenever you use the Bissell SteamShot.
The detail brush tool is perfect for cleaning baked-on grease on the stovetop or dried fruit juice in the refrigerator. I tested the detail brush tool on my stovetop, which had a very bad boil over.
Here’s how to use the detail brush tool:
- Attach the accessory nozzle to the steamer.
- Attach the detail brush to the end of the accessory nozzle.
- Press the on-demand trigger as you scrub a surface with the brush.
- Wipe the surface once every few minutes to remove the grime.
The combination of hot steam and agitation from the detail brush did a great job blasting the tough, baked-on boil over mess on my stove top. I also appreciate the on-demand trigger because it lets me stop and use a microfiber cloth to wipe excess water from the steamer.
After using the Bissell SteamShot, my stovetop is clean and looks almost brand new.
I have used steamers without an on-demand trigger in the past. Having to stop and unplug a steamer when I needed to stop, and then plug it again is a hassle. Not to mention, I have to wait for the steamer to reheat, which means that I have to spend more time cleaning up a mess.
As far as the brushes go, I love the density. They are very stiff and can withstand the stubborn grease and grime without bending too much. Overall, I am very happy with the results.
7. Using the angle concentrator tool
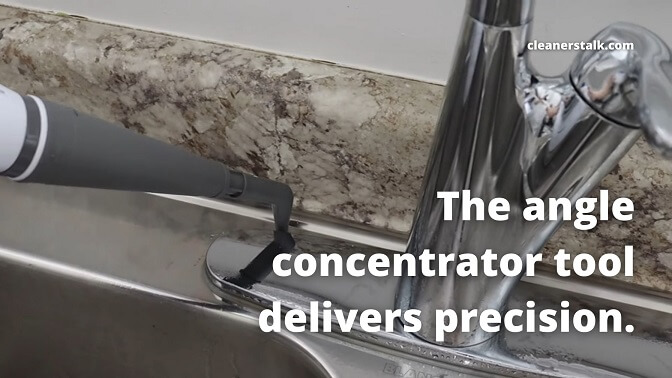
The angle concentrator tool attached to the end of the accessory tool. It is designed to direct steam with accuracy and precision because the tip is very small.
Here’s how to use the angle concentrator tool:
- Attach the accessory tool to the Bissell SteamShot.
- Attach the angle concentrator tool to the end of the accessory tool.
- Press the on-demand trigger as you direct steam to concentrated areas.
I tried using the angle concentrator tool around the perimeter of my kitchen faucet. It did a great job of removing the hard water deposits, which would be difficult to remove just by using a piece of cloth.
8. Using the flat scraping tool
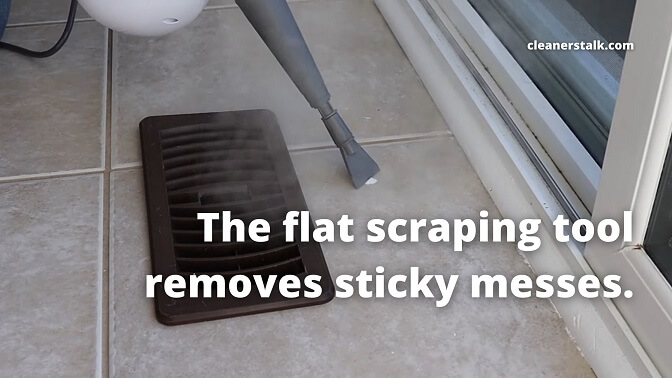
The flat scraping tool is perfect for removing wallpaper, cleaning gum, and removing extra sticky messes. To use the flat scraping tool, all you have to do is attach the accessory nozzle to the Bissell SteamShot, then attach the flat scraping tool to the end of the accessory nozzle.
I had a small amount of dried up paint on my tile, so I applied short blasts of steam along with the scraping tool. The combination of hot steam and the scraping tool allowed me to scrape paint off my tile.
9. Using the fabric steamer tool
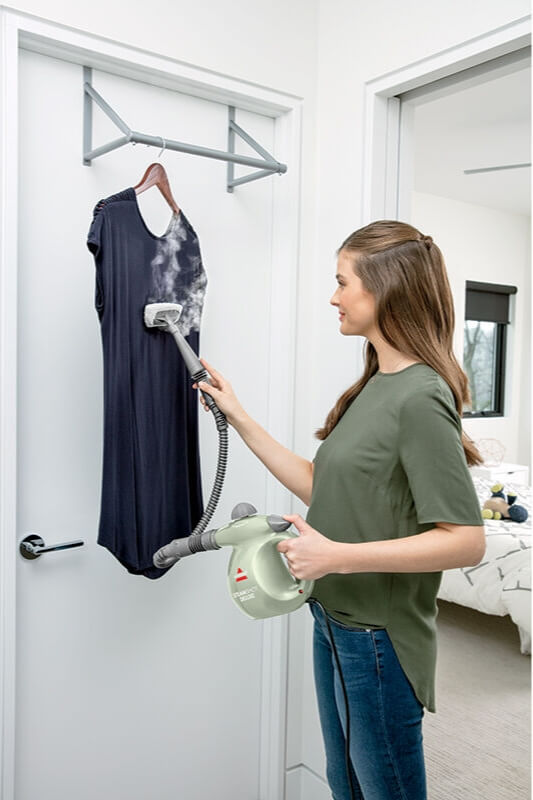
The Bissell SteamShot comes with a fabric steaming tool. It is designed to refresh and remove wrinkles on clothing or drapes. Before using the fabric steamer, attach the fabric steamer tool to the end of the accessory nozzle, then attach the microfiber cloth over the fabric steamer tool.
Here’s how to remove wrinkles from clothes:
- Test for color fastness in a hidden area. If the color is affected, do not use it.
- Hang clothing from a shower rod or clothes hook using a sturdy clothes hanger.
- Fill with cool tap water or distilled/demineralized water.
- Connect the plug to an appropriate outlet.
- Attach the fabric steamer tool with the pad attached.
- Press trigger to release steam.
- Move over fabric taking care not to concentrate steam in a single area.
When using the fabric steamer tool, please keep two important things in mind. First, do not tilt the steamer more than 45° during use as boiling water could spill with the steam. Second, do not use the steamer on the clothing you are wearing. You can easily burn yourself.
Ready to use your Bissell SteamShot?
And there you have it, the complete guide on how to use Bissell SteamShot and all of its attachments.
After you are finished using the Bissell SteamShot, unplug it. The water tank is still under pressure, so press the trigger before removing the safety cap. Once the safety cap is removed, pour out excess water.
Overall, the Bissell SteamShot is a very handy steamer and cleaning tool combined into one. It is definitely very handy to have around the house because you can use it in the kitchen, in the bathroom, on your clothes, on your windows, or in the garage. And the best part: it uses only water!
It’s so versatile because there are so many possibilities. Hopefully you do not regret buying it. If you have not bought it but you are considering it, we highly recommend buying the Bissell SteamShot.
If you are having problems with your Bissell SteamShot, you may want to troubleshoot the issue. We have a comprehensive guide that walls you through each problem and give you the solution. Read it here.
Related articles:

Sofia Rodriguez
As a professional house cleaner, I'm passionate about cleanliness. I write this blog to help anyone take better care of their homes and ultimately their loved ones.

