
Why is My Robot Vacuum Squeaking? Here’s the Easy Fix
Cleaners Talk is reader-supported. This post contains affiliate links, we may earn a commission at no additional costs to you. As an Amazon Associate we earn from qualifying purchases.
It does not matter whether you own a Roomba or a Deebot, as well as a Shark Ion robot or a Eufy, sometimes, a robot vacuum can produce a squeaking noise while going for a cleaning run.
So, why is your robot vacuum squeaking?
The squeaking noise is usually caused by friction between the plastic and/or metal parts. A robot vacuum has two moving parts: the wheels and the brushes. Try spinning them manually. That might give you a hint of where the squeaking is coming from, then apply a tiny bit of dry lubricant.
Sometimes, the side brush is the main culprit of the squeaking.
Whatever the case might be, you don’t need to disassemble the entire robot just to fix the squeaking sound. In this post, I will show you the simple way on how to stop a robot vacuum from squeaking.
How to Stop Robot Vacuum (Roomba) From Squeaking
I was experiencing a very loud squeaking sound coming from my iRobot Roomba while it was running and vacuuming. It got to the point where the squeaking sound was so high-pitched and was louder than the actual sound of the robot vacuuming. To say that it was annoying was an understatement.
When looking online, all of the suggestions that were given to me involved taking the wheels apart, cleaning and lubricating them. But I don’t want to remove the chassis just to fix a squeaking sound.
Fortunately, I found a way to fix the squeaking sound without having to take apart the robot.
For this article, I was using my Roomba 960, but this trick can probably be applied to all robot vacuum models due to their similar designs.
1. Lubricate the caster wheels
After doing a close inspection, I found out that the squeaking sound was coming from one of its wheels. More specifically, the sound was coming from one of the wheel axles.
If you look closely, there is a small hole on the outer side of each wheel.
That hole allows access to the wheel axle. And while turning each wheel manually, I could see the axle spinning, so it seems like a good access point for some lubrication.
Before we move on, a word of warning: you want to be careful with what kind of lubrication to use. I recommend using a lubricant that is going to dry out, otherwise, it will drip down to the wheels and cause a big mess. I recommend using this dry lubricant for this solution.
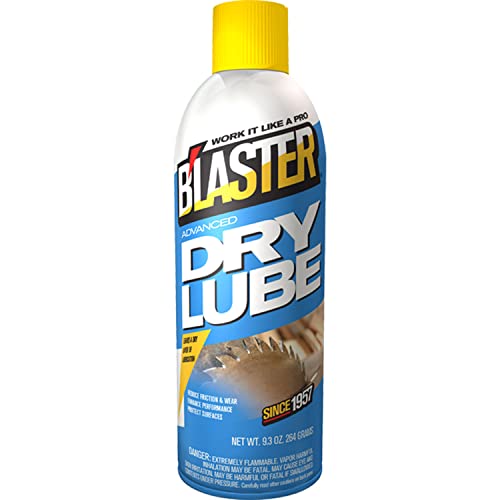
- Provides superior, long-lasting lubrication for every household lubricant need
- Use on locks and catches, hinges, cables, window tracks and glass, rope, door tracks and conveyor belts
- It's also safe for use on plastics
Using the pinpoint straw application tool (comes with the purchase), apply a small squirt one at a time directly into the small hole on the side of the wheels. A quick shot of lubricant on the axle, followed by rotating the wheel to work it in will stop the squeak.
During this step, you may want to keep a paper towel nearby just in case you over-spray and need to wipe up residue from the lubricant.
As soon as I start to rotate the wheel manually after a quick shot of lubricant, I can tell right away that the squeaking sound has disappeared. Don’t flip the robot vacuum over and wait for the lubricant to dry out.
You can also do the same thing and apply a small squirt of dry lubricant into the other wheel’s axle as a preventative measure.
2. Lubricate the side brush
Sometimes, the squeaking sound can originate from friction caused by the side brush components.
If the side brush is the culprit, it may sound like this:
The side brush is designed to gather dust and debris onto the path of a robot vacuum. Over time, the components inside will wear and cause friction between its parts.
Now if this is the case, you will need a Phillips screwdriver to open up the side brush.

Once you have removed the side brush with a screwdriver, spray a tiny bit of dry lubricant. Apply it around the outside of the yellow part and spin it around to spread the lubricant evenly.
Leave it to dry and give it a test run after. The lubrication should reduce the friction and fix the squeaking sound coming from the side brush.
3. Clean debris from the brush roller, then lubricate
Last but not least, the squeaking sound may come from the main brush roller.
While this issue is the least common of the three, it’s always a good idea to check the brush roller. In most cases, the brush roller becomes tangled with fur, hair, and debris to the point where it does not rotate freely.
If the brush roller does not rotate freely, then the components may produce a squeaking sound. You can learn more about how to thoroughly clean a robot vacuum’s brush roller right here.
Additionally, the brush motor can become so dry, to the point where the gears won’t turn properly. If you are using an older Roomba, the brush motor may be too weak to work and spin freely.
Although not very common, there have been some failure reports of a Roomba brush motor. This may be the reason all along, especially if you haven’t applied oil or lubrication to the brush motor for a long time.
Final words
Now you know why your robot vacuum is squeaking.
A robot vacuum may produce a squeaking sound if there is friction between its moving parts. Applying a tiny bit of lubrication into the wheel axle and/or the side brush will stop the squeaking sound.
Robot vacuums last between 5 to 8 years. If you feel like it’s time for your robot vacuum to retire, consider buying a new one. You will enjoy more time as it cleans your house with less trouble.
You may also want to read our comparison reviews:

Ryan O'Connor
I write about house cleaning and vacuum cleaners. For me, nothing is more important than a clean environment to ensure both a healthy and happy life. Learn more.