Why Is My Neato Botvac Not Charging? Here’s the Solution
Cleaners Talk is reader-supported. This post contains affiliate links, we may earn a commission at no additional costs to you. As an Amazon Associate we earn from qualifying purchases.
Whether you have the XV Series or the D7, a Neato Botvac is an intelligent robot vacuum that cleans your house without your supervision because it runs on battery. Unfortunately, some users have trouble charging the robot. So, why is your Neato Botvac not charging?
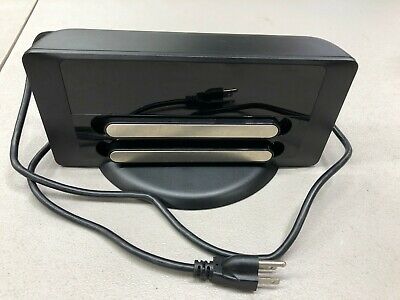
If your Neato Botvac is not charging, the cables inside the charge base (one connecting to the transformer and one to the charge base) may not be plugged in properly. Unplug the charge base and open up the chassis. Inspect the cables and make sure they are plugged in properly.
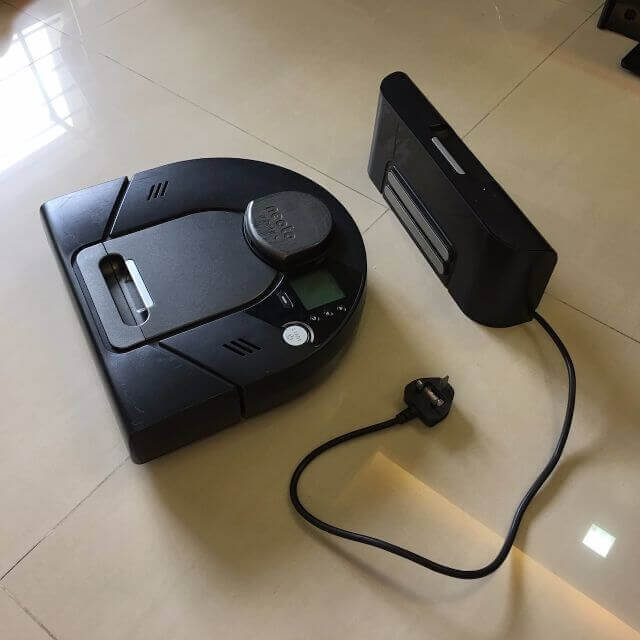
A Neato Botvac will also not charge properly if the charge bars on the charge base and the robot is dirty. Clean the charge bars on the charge base and the robot with a dry cloth.
Contrary to popular belief, troubleshooting a Neato Botvac that is not charging is simpler than you can imagine. In this post, we will show you how to fix a Neato Botvac that is not charging.
Why Neato Botvac Is Not Charging

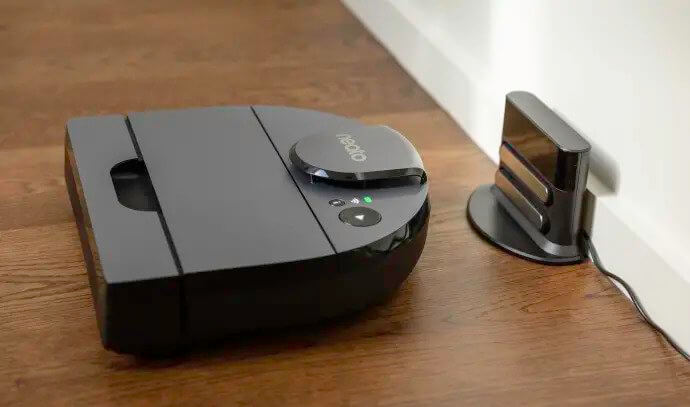
A Neato Botvac will not charge if the charge bars are dirty.
Assuming that your Neato Botvac is not damaged, or it is still relatively new, you can always diagnose the issue of the robot failing to charge. Here are the reasons why a Neato Botvac is not charging:
- The power outlet you are using is not working.
- The charge bars (on the charge base and robot) are dirty.
- The cable connected to the charge base is not completely pushed in.
- The screen display is still loading.
- The cables inside the charge base are not connected properly.
The good news is, troubleshooting the issues above is very easy. All you need is to know where to inspect and what to fix. Read on below to learn how to fix a Neato Botvac that is not charging.
How to fix a Neato Botvac not charging
If your Neato Botvac is not charging, please follow the troubleshooting steps below:
- Check the power outlet - Please make sure there is power to the outlet the charge base is plugged into. Try plugging another electrical device, like a phone charger, to see if the outlet is working properly. In some cases, a Neato Botvac is not charging because the power outlet is not working.
- Clean the charge bars - A Neato Botvac will not charge properly if the charge bars on the charge base and the robot is dirty. Clean the charge bars on the charge base and the robot with a dry cloth and make sure they are clear of debris.
- Check the cable - Make sure the cable that is connected to the back of the charge base is completely pushed in. While it may sound simple, not pushing the cable all the way in is one of the most common reasons why a Neato Botvac is not charging.
- Connect the charge base directly - If the power outlet is working, connect the charge base directly to the outlet instead of connecting it to the power strip to see if the Neato Botvac charges.
- Be patient and wait for one minute - It may take a Neato Botvac up to one minute to display anything on the screen or the lights around the buttons. If there is no activity, click on the home button to start and make sure the on/off switch is in the on position inside the dustbin (for Botvac Connected and D80/D85 models only).
If you have done all of the above but your Neato Botvac is still not charging, it’s time to inspect the inside of the charge base. This troubleshooting tip will apply to all types of Neato Botvacs.
First, unplug the charge base from the power outlet. Press on the button at the top of the charge base to open up the chassis. Once you open it, you will see a typical transformer inside.
What you need to make sure is that the cable is plugged in properly to the transformer. Then, you need to make sure that the transformer is connected properly to the charge base itself.
Both cables should feel snug and firmly plugged in. Make sure that the small green light on the transformer is turned on. Nine times out of ten, the cables inside the charge base are not connected properly, causing the Neato Botvac to not charge.
Once you have made sure that both cables inside the charge base are connected, close the chassis and reconnect the Neato Botvac to the charge base. Now, your Neato Botvac should charge normally.
FAQ on Charging a Neato Botvac

1. How do I know if my Neato Botvac is charging?
A Neato Botvac is charging when the battery LED indicator is pulsing yellow. It must complete charging before it can start cleaning. Once the battery LED indicator is pulsing or solid green, it can start cleaning.
If the Neato Botvac battery LED indicator is pulsing red, it means that battery level is low and must be charged before a new cleaning can be started.
2. How long does it take for a Neato Botvac to charge?
A Neato Botvac will charge from depleted to full in 2 to 3 hours (closer to 90 minutes), with a room temperature battery, in a 74°F room. The battery LED will turn solid green once it is fully charged.
3. How long should a Neato Botvac battery last?
On average, a fully-charged Neato Botvac battery lasts about between 100 to 300 minutes, depending on the model. However, the robot’s battery life lasts closer to 60 to 120 minutes when it is running on the high-performance Turbo mode.
Here is a short list of the maximum battery life of popular Neato Botvacs:
- Neato D8 - 100 minutes of runtime
- Neato D9 - 200 minutes of runtime
- Neato D10 - 300 minutes of runtime
A Neato Botvac battery degrades over time and typically lasts 100-150 recharges. So each time the Neato Botvac goes back to the charge base for a recharge, it is slowly eating away its battery life.
If you are cleaning 1-2 times a week (3 charges per week), the battery typically lasts 8 months.
Once the battery is no longer able to hold a charge (shutting off after less than 20 minutes), you will need to replace the battery. You can buy a new battery by visiting the official Neato accessories store on Amazon.
4. How to replace a Neato Botvac battery
Once you have acquired a new replacement Neato battery, you need to replace the old one. Here’s how:
To replace a Neato Botvac battery, flip the robot over and open the battery door by removing the two screws with a Phillips screwdriver. Carefully lift the battery out of the cavity then use your thumb to press the clip securing the battery connector into the robot.
Align the connector on the new battery to the robot and lightly press it into place until you hear a click. Insert the battery into the cavity and replace the battery door.
5. How to prolong a Neato Botvac battery life
Your Neato Botvac battery comes partially charged.
Before you use your Neato Botvac for the first time, position it at the charge base and allow the robot to charge until the battery LED becomes green (up to 3 hours).
In order to get the best performance from your robot and battery, it is essential to “condition” the Neato Botvac battery by running 3 full cleaning cycles, which means fully charging and fully depleting the battery three times in succession.
If you do not condition your battery, your robot will not perform at full capacity, so please take the time to do so. Here’s how:
- Cycle 01 - Charge your Neato Botvac on the charge base for at least 3-5 hours. Press the CLEAN HOUSE button and continuously run the robot until the LCD screen shows “Low battery.” Do not let the robot recharge before you see the “Low battery” message.
- Cycle 02 - Charge the robot fully again. Press the CLEAN HOUSE button and run continuously until the LCD screen shows “Low battery.”
- Cycle 03 - Charge the robot fully again. Press the CLEAN HOUSE button and run continuously until the LCD screen shows “Low battery.”
Your Neato Botvac battery is now conditioned and optimized for maximum runtime. You can now charge and run your Neato Botvac normally.
Since I am very meticulous with my robot vacuums, I always time the new battery with a stopwatch when I first get them to determine their 100% health, and track their performance degradation.
A new Neato Botvac battery will run according to its model runtime stated on Neato’s website, but will slowly decrease over the next few months. Once the battery performs less than 20 minutes, I will replace the battery.
Please remember to reset the battery counter in the Neato setting menu to "New Battery" when you replace the battery. If you don't do this, the Neato Botvac will not fully discharge.
Final Words
Now you know why your Neato Botvac is not charging, including the complete tips on how to take care of your battery to prolong its lifespan. I hope that this article has been helpful to you. Have a good day. 🙂
You may also want to read:

Christopher White
I'm a freelance writer and editor for Cleaners Talk. I don't claim to be a cleaning expert, but I have 8 Roombas at home, including 2 robot mops. I love to tinker with them.
