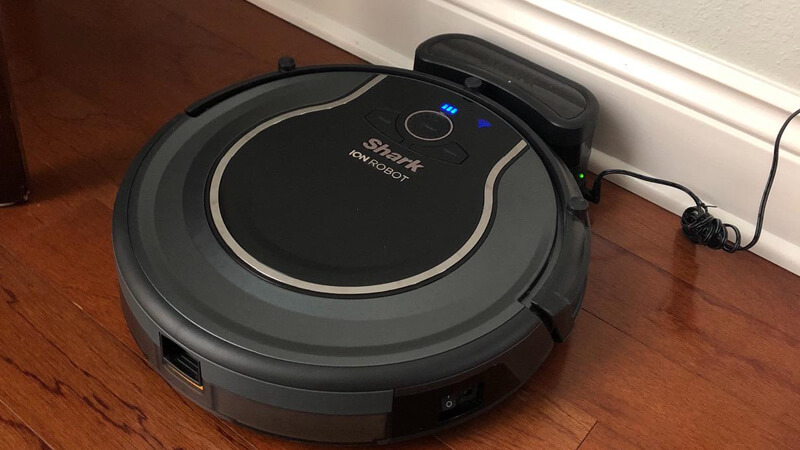
Shark Robot Won’t Charge? Here Are 7 Simple Solutions
Cleaners Talk is reader-supported. This post contains affiliate links, we may earn a commission at no additional costs to you. As an Amazon Associate we earn from qualifying purchases.
Charging your Shark robot vacuum is very simple. If your Shark robot is not charging, first, make sure the charging station is plugged properly into a working outlet.
- A solid green light on the side of the charging dock should illuminate. If there is no light on the charging dock, or the light is flashing, try a different outlet.
- Next, make sure the power button on the side of the Shark robot is turned on.
If these simple tips do not work, let’s troubleshoot the issue in a simple step-by-step guide.
How to Troubleshoot a Shark Robot Not Charging
Sometimes, a Shark robot may have trouble charging itself. If your Shark robot is not charging, follow these 7 troubleshooting steps to get your Shark robot charging again:
1. The power button on the side of the Shark robot is OFF
Unlike most robot vacuums, a Shark robot has a power button located on the side of the robot. To enable the Shark robot to charge itself properly, the power button must be switched on.
9 times out of 10, the power button that is switched off is the reason why a Shark robot is not charging. Many Shark robot owners do not know this because not all robot vacs have a power button on the side.
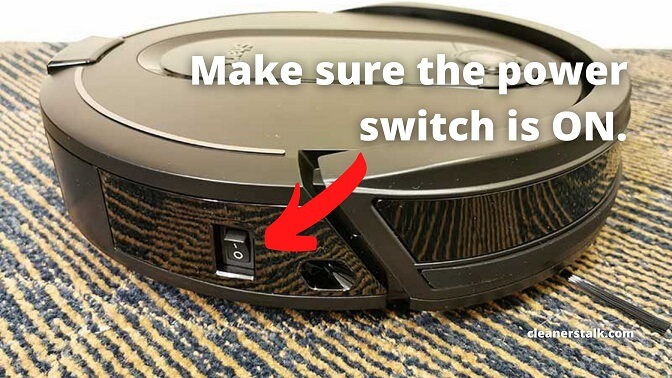
Check the power button. Often, it is switched off accidentally when the Shark robot bumped into a wall without you noticing because it is located on the robot’s side. If the power switch is off, then that is the reason why your Shark robot is not charging. It’s as simple as that.
If the power switch is turned on but your robot is still not charging, continue to the next step.
2. The Shark robot’s proximity sensors and infrared lights are dirty
Open the Shark robot’s front bumper. You will find the robot’s infrared lights and proximity sensors. These sensors not only help the robot navigate around your home, but they also help it locate its charging dock. If they are dirty, the Shark robot won’t be able to find its way home.
If you notice a heavy buildup of dust and debris, clean them carefully by wiping them with a dry microfiber cloth. You can also use a can of compressed air to remove dust buildup from hard-to-reach areas.
3. Dusty charging dock
Another possible reason why your Shark robot is not charging is a dusty charging dock.
On the body of the charging dock, you will see a black area that resembles a pair of “sunglasses”. This area is the dock’s sensors which help communicate its location by sending infrared signals to the Shark robot.
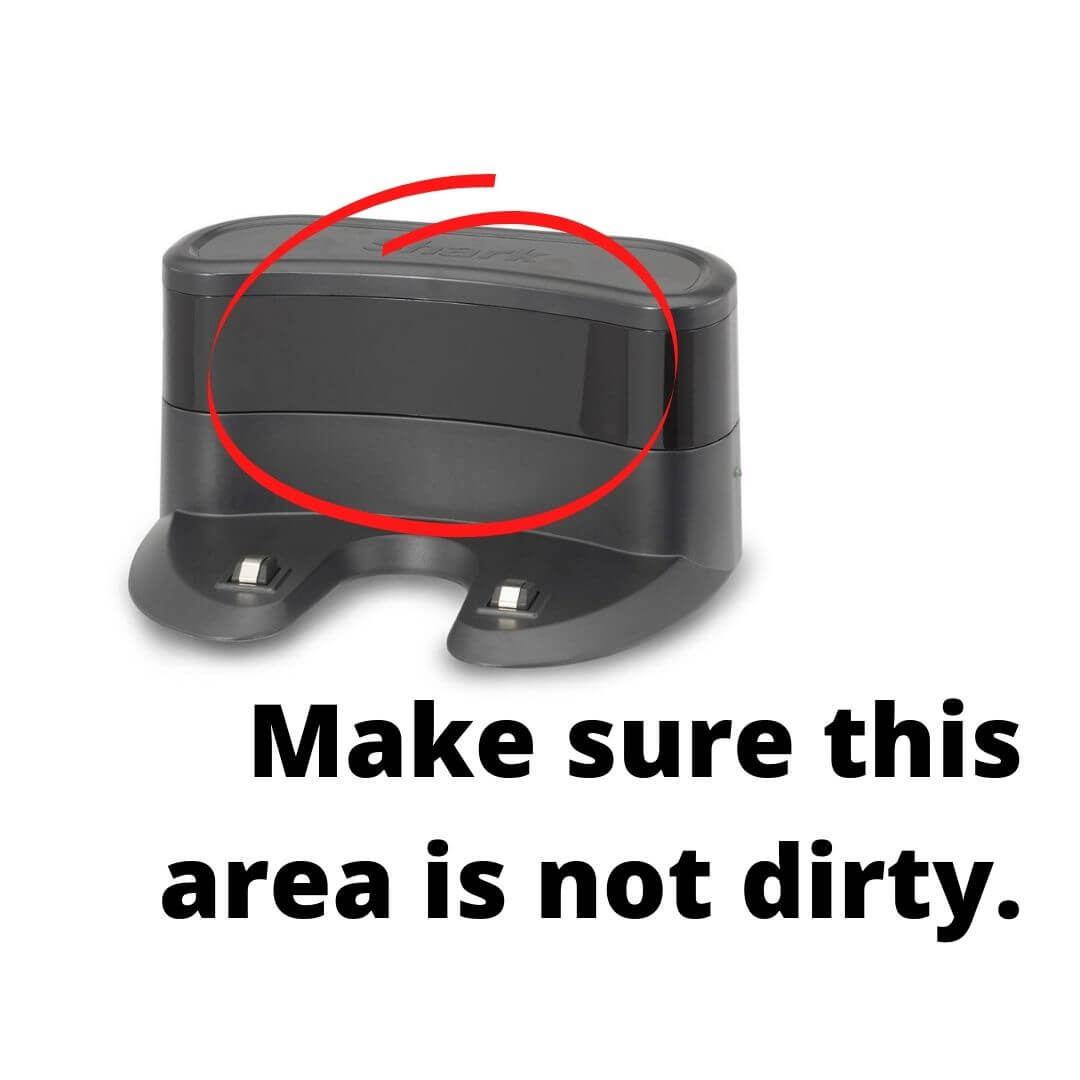
Over time, the sensors on the charging dock will get dusty, especially since many robot owners tend to take care of their robots more and neglect the “less important” charging station.
Use a dry microfiber cloth to clean the charging dock’s sensors. If the sensors are particularly dirty, you can also use alcohol wipes to remove stubborn grimes effectively and easily.
4. The springs on the charging pins are loose
There are two metal pins on the charging dock. They are spring-activated and connect to the charging contacts on the bottom front part of the robot. Unfortunately, these springs on the charging pins can break and go depressed over time. If only one charging pin is working, the robot is not going to make a connection.
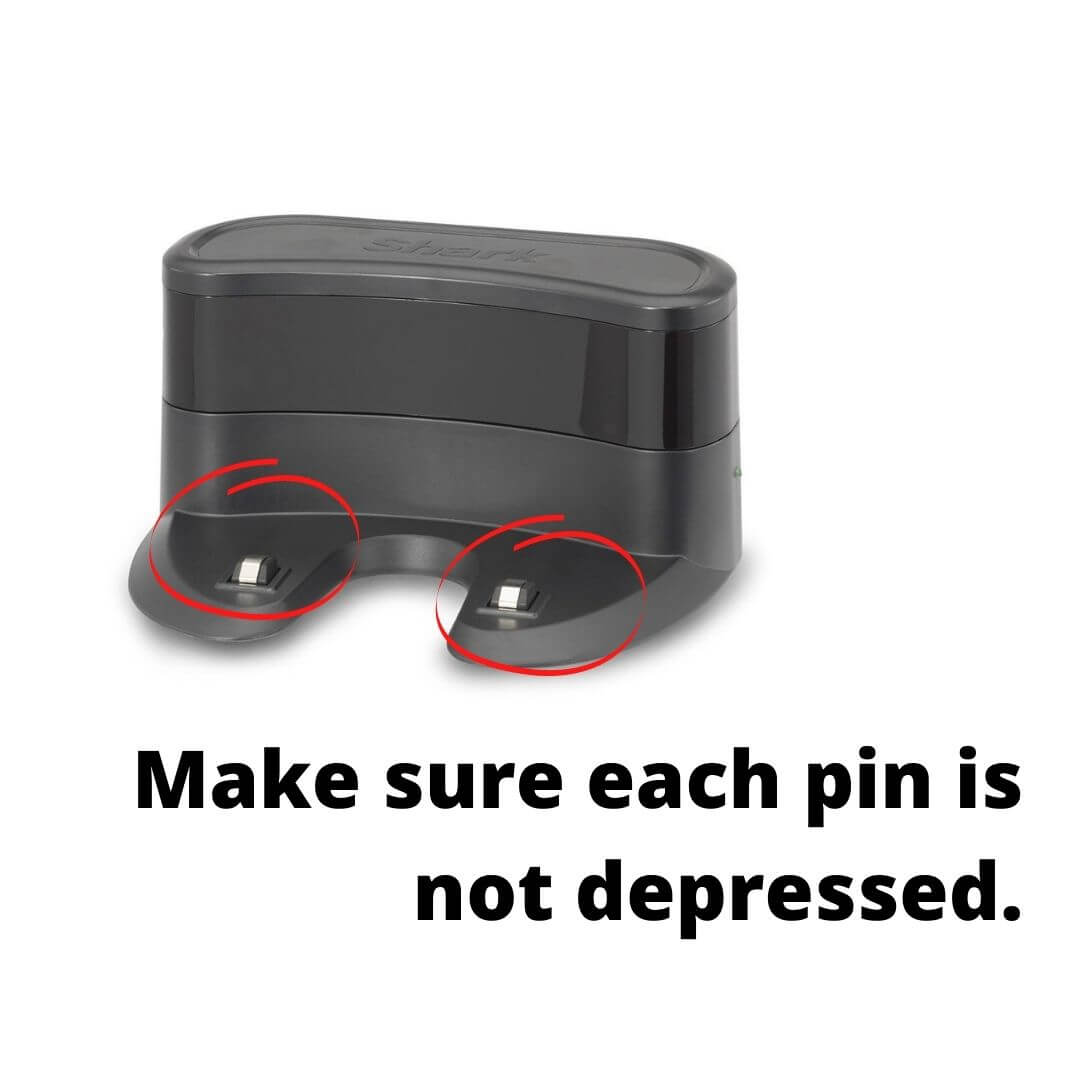
A telltale sign if the springs on the charging pins are loose is when the Shark robot tries to dock itself, but it is unable to do so. As a result, it keeps moving back and forth in front of the charging station.
Try pressing each metal pin on the charging dock with your finger. Each pin should be able to spring back up effortlessly. If one of the pins, or both, are starting to catch and not spring back up, then you need to buy a replacement charging dock.
5. The charging contacts on the Shark robot are very dirty
If you have inspected the charging pins on the dock, then the next thing to check is the charging contacts on the Shark robot itself. Flip the robot over and inspect the two metal squares on the front part of the robot.
If you notice a “film” over each square, then it means the charging contacts are dirty. This is natural because as the robot goes through dust and dirt, the debris is going to build up over the charging contacts. You never know what nasty things your robot has gone through just to clean your home!
Use a dry microfiber cloth to clean the Shark robot’s charging contacts. If the sensors are particularly dirty, you can also use alcohol wipes to remove stubborn grimes effectively and easily.
6. Connection issue with the battery
While not common, there may be a connection issue with the Shark robot’s battery. Try unplugging the battery and reconnect it. If there is a connection issue with the battery, your Shark robot should power up immediately and the battery should be able to start charging.
If you have had your Shark robot for some time, and the battery is no longer able to hold its charge, then you need a replacement battery. You can buy a new battery.
- Battery Type:Li-ion / Voltage:14.8V / Capacity:2600mAh. High capacity for your imachine, enough for clean the whole house
- This Battery NOT Fit for Shark Ion Robots RV700,RV720,RV750,RV755, NOT Fit for RVBAT700 Battery
- This Battery ONLY Fit for Shark Ion Robot RV700_N, RV720_N, RV725_N, RV761, RV850, RV850BRN, RV850C, RV850WV, RV851WV, RV871, RV871C ,RV1000S, UR1000SR...
7. The Shark robot is not properly aligned with its dock
The main issue we find with a Shark robot not charging is because the robot is not properly aligned with its dock. If the robot has no charge and cannot return to the dock, manually place it on the dock.
To manually place your Shark robot on its charger, make sure that the metal charging plates on the bottom of the robot are aligned with the metal charging contacts on the dock.
With the bumper facing forward, center your Shark robot and place it ½ inch away from the dock. In a few moments, you should see the blue light on top of the Shark robot begin to flash, which means it is charging.
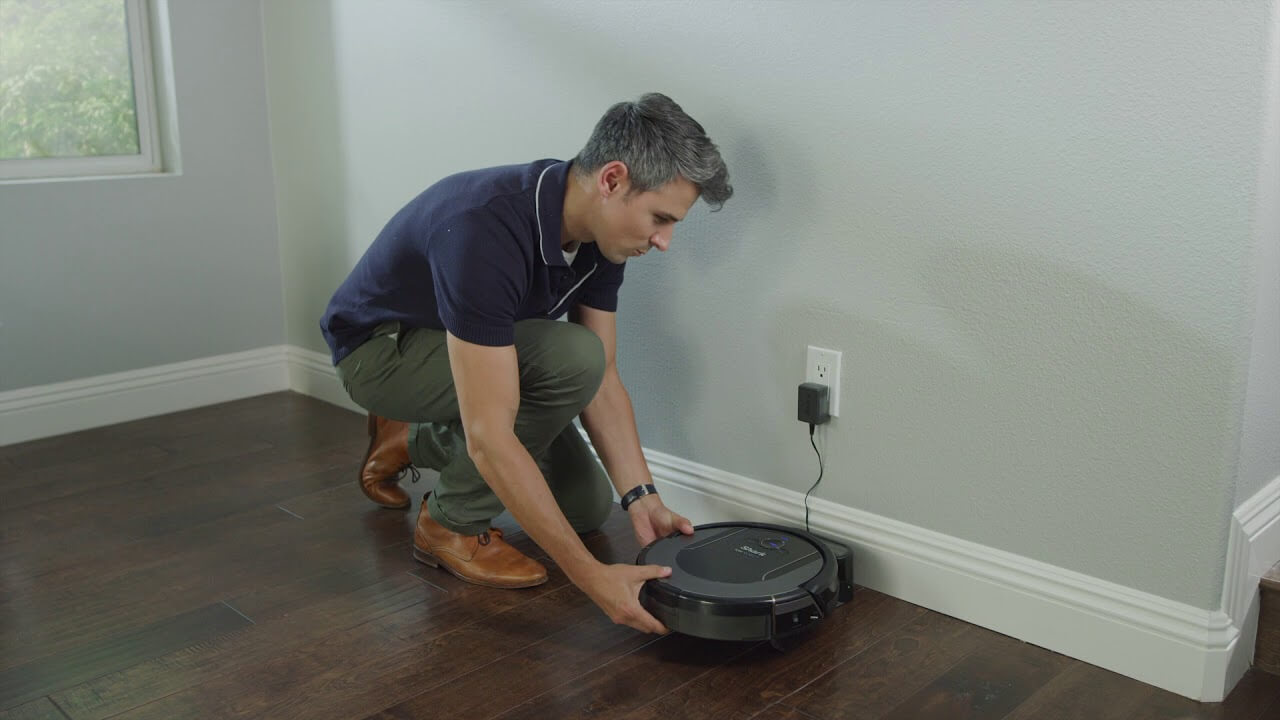
If you do not see flashing blue lights on your Shark robot or see a red error light, it means your Shark robot is not properly placed in the dock. Try pushing the Shark robot forward to engage contact between the vacuum and the charging station until you see flashing blue lights.
Make sure to slowly twist the Shark robot back and forth until the light on the charger turns blue. If it goes back to green, repeat the back and forth until it turns blue and hold that position for a short time until the blue battery indicator lights up on the Shark robot. You should be able to let go and it will charge.
You can also send your robot to its charging station by simply pressing the DOCK button. Try pressing the button while the robot is near the dock. When you see the flashing blue lights, your Shark robot is charging.
If all else fails, you can try a simple reboot before repeating each of the troubleshooting steps. Turn off the power switch on the side of the Shark robot, wait at least 10 seconds before turning it back on.
Also, it’s a good idea to select a permanent location for the Shark charging dock, because every time you relocate it, your Shark robot will have to completely remap your house.
FAQ on Shark robot battery and charging
Below, we cover some of the most frequently asked questions about a Shark robot’s battery and its charging dock. We will always add new answers to this page, so bookmark it if you want to stay up to date.
1. How long does it take a Shark robot to charge?
Every Shark robot has a pre-installed rechargeable battery. It takes about 5 to 6 hours to fully charge a Shark robot. To charge, the power button on the side of the Shark robot must be in the ON position (I). The battery should be fully charged before using.
2. How do I know if my Shark robot is charging?
The blue indicator lights on the Shark robot show how much charge is remaining. While the Shark robot is charging, both blue LED lights will flash. When charging is complete, both blue lights will illuminate steadily.
3. How long does Shark robot battery last?
The expected runtime of a Shark robot’s battery is about 60 minutes. However, this depends on the cleaning mode you are using and the type of surface of your home.
A Shark robot battery, like all lithium-ion products, will naturally decrease in capacity over time from the 100% capacity of a new battery. The battery life expectancy of a Shark robot is at least two years and comes with a two-year limited warranty.
Bottom Line
Now you know why your Shark robot is not charging. Unlike most robot vacuums without a power switch on the side, a Shark robot may not charge if its power switch is turned off.
Before panicking, try inspecting the power switch on the side of the robot. Also, make sure the charging dock’s light is green. This indicates that the charging dock is working properly.
If you need further help or information about your Shark robot, don’t hesitate to contact Shark Customer Service. They would be more than happy to diagnose any problem and help you fix it.
Other helpful Shark robot articles:


