How to Replace Eufy Side Brush Motors (With Video)
Cleaners Talk is reader-supported. This post contains affiliate links, we may earn a commission at no additional costs to you. As an Amazon Associate we earn from qualifying purchases.
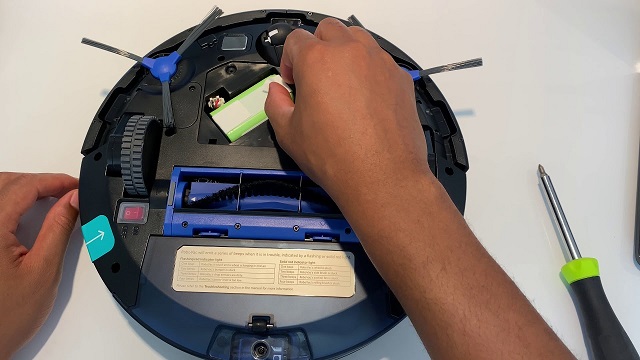
A Eufy robovac has two side brush motors. Replacing worn side brush motors can make your Eufy robovac much quieter. In this post, you will learn how to replace Eufy side brush motors, in order to keep your robot running and cleaning at peak performance or when the side brushes are no longer spinning.
How to Replace Eufy Side Brush Motors
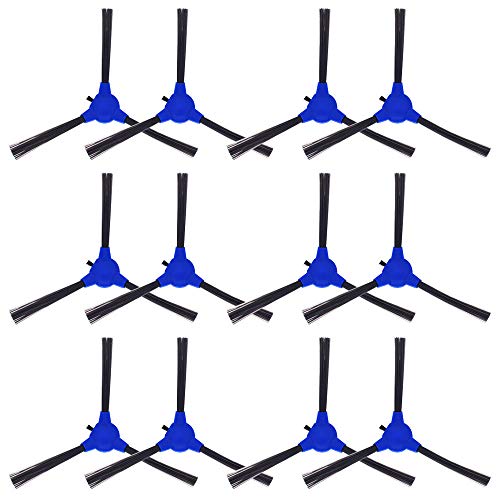
Before you replace the Eufy side brush motors, you will need to have the replacements ready. Remember, you need two. You can buy new side brushes and their motors below:
This how-to guide is going to be quite technical. So if you need a visual guide, you can watch the video below. You can also choose to read the text version below the video.
Before you do anything like in the video below, we strongly suggest removing the battery first. If you drop a screw on the motherboard, it's toast with the battery still attached.
Step 1: Disassemble the Eufy Robovac
Begin by turning the robovac over and turning off the power switch.
To prevent electrostatic discharge (ESD), disassemble the robovac after the main power switch has been turned off for over 5 minutes.
Remove the side brushes, the brush guard, and the rolling brush.
Remove the dust bin.
Use a screwdriver to disassemble the two screws under the rolling brush bearings on the Eufy robovac.
Use a screwdriver to disassemble the eight screws under the bumper.
There will be several different screws you will need to disassemble and reassemble, so make sure that you keep these separate and do not get them mixed up during the process.
Take the signal bracket off from under the bumper. There are two pieces.
Now, take off the bumper. Be careful to unplug the bumper from the main board when you do so.
Now, use a screwdriver to disassemble the eight screws on the bottom of the Eufy robovac. Again, please remember to keep these screws separate from the other screws.
Turn the Eufy robovac over again with the glass top part on the top, with the main power button facing down. Hold the bottom part of your robovac and carefully remove the top glass part separating them.
Unplug the top part from the motherboard.
Step 2: Disassemble the Side Brush Motors
Use a screwdriver to remove the three big silver screws on the main board. Again, make sure to keep these screws separate from the other screws, as all of them are different.
Now is a good time to take a picture using your smartphone of the main board, so that you can reassemble it later with ease. While it may sound simple, having a picture really helps to reassemble the main board.
Unplug the wires connecting the side brush motors to the main board.
Remove the main board, being careful not to damage any of the electric components.
Now, take off the signal bracket and move it forward so that you can access the side brush motors.
Use a screwdriver to remove the three screws on the side brush motor.
Keep the three screws that hold the side brush motor on for later when you reinstall the new side brush motor. Repeat the process to remove the other side brush motor.
Step 3: Replace the Side Brush Motor
Put in the new side brush motor. Use a screwdriver to reinstall the three screws of the side brush motor.
Connect the side brush motor to the main board.
Put the main board in place after you have reinstalled both side brush motors.
Reinstall the three big silver screws on the main board.
Reorganize the wires and check the original picture on your smartphone to make sure that all is set properly.
Step 4: Reassemble the Eufy Robovac
Take the top glass shell and reconnect the cable from the start button to the main board.
Close the top glass shell.
Turn over the Eufy robovac.
Reassemble the two screws under the brush bearings of the robot.
Then, reassemble the eight screws on the bottom of the robot.
Reassemble the bumper and put it back into place. Make sure you plug it into the main board.
After reassembling the bumper, shake and tap the bumpers to make sure that it can spring back.
Reassemble the signal bracket under the bumper. Remember that there are two parts, and that you should use the correct screws.
Reassemble the eight screws under the bumper. After reassembling the signal bracket bumper, shake and tap the bumpers again to make sure that the new bumper can spring back. If it has trouble springing back, you may have overtightened the screws.
Put the side brushes, the rolling brush, and the dust bin, back into place.
Your Eufy robovac is now reassembled and ready to use.
Heads up: Looking for a new Eufy robot vacuum? You should read our review of the top 3 Eufy RoboVac models right here. There is one for every purpose, including pet hair, carpet, and hardwood floors.


