How to Use Bissell Pet Stain Eraser (Beginner’s Manual)
Cleaners Talk is reader-supported. This post contains affiliate links, we may earn a commission at no additional costs to you. As an Amazon Associate we earn from qualifying purchases.
Using your Bissell Pet Stain Eraser for spot cleaning carpet and upholstery is easy. We’ll show you how. In this post, we share with you the beginner’s manual on how to use the Bissell Pet Stain Eraser.
How to use Bissell Pet Stain Eraser in 5 steps
There are 5 steps to using the Bissell Pet Stain Eraser. The first 4 steps are mandatory, while the last step is only for select models. Using the Bissell Pet Stain Eraser involves charging the battery, filling the solution tank, pre-treating the stain, spot cleaning, and lastly window cleaning.
Here are the steps on how to use Bissell Pet Stain Eraser:
1. Charge the battery
Before charging, make sure the unit is off by ensuring the battery status indicator lights are not illuminated. Insert the charging adapter plug into the charging port on the handle near the base of the unit.
Next, plug the adapter into a suitable wall outlet. The battery status indicator lights will illuminate when charging. For maximum run time, charge the unit 4 hours prior to use. On the first use, make sure your unit is fully charged before using it. The Pet Stain Eraser has a 15 minute run time.
NOTE: There is a door covering the charging port that will automatically slide out of the way when the charging adapter is inserted. To check the battery status, turn the machine ON by pressing the power button on the handle. Battery is fully charged when all three of the blue status lights are illuminated.
2. Fill the solution tank
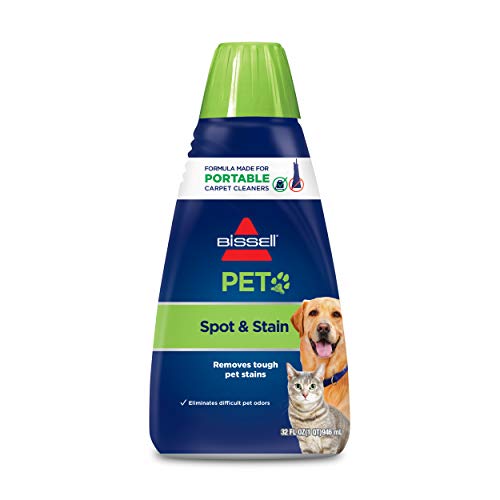
When filling the Bissell Pet Stain Eraser solution tank, no water is needed when using BISSELL Portable Deep Cleaning Formula. Here are the steps on how to fill the Bissell Pet Stain Eraser solution tank:
- Pull the tank away at an angle to remove it from the unit.
- Twist and remove the tank cap.
- Add formula to the indicated fill line on the solution tank.
- If desired, add 1/2 ounce of BISSELL BOOST Formula to 2X Pet Stain & Odor formula.
- Twist to replace the cap on the tank.
- Return the tank to the unit making sure it is fully seated.
On Sale
Bissell 74R7 Pet Stain & Odor...
|
To ensure the solution tank is fully seated on the Bissell Pet Stain Eraser, make sure you hear an audible click and that there are no gaps in the seams between the tank and unit. Otherwise, it could leak.
3. Pre-treat the stain
IMPORTANT: Check the manufacturer’s tag before cleaning upholstery. “W” or “WS” on the tag means you can use your Pet Stain Eraser. If the tag is coded with an “S” (with diagonal strike-through), or says “Dry Clean Only,” do not proceed. If the manufacturer's tag is missing or not coded, check with your furniture dealer.
Here’s how to pre-treat stained or soiled areas with Bissell Pet Stain Eraser:
- Check the manufacturer’s tag before cleaning upholstery.
- Push the power button to turn the unit ON.
- Battery status lights will illuminate to show how much battery remains.
- To pretreat stained or soiled areas, hold the unit above the soiled surface and press the spray trigger until the entire area is wet.
- Let the cleaning solution set for 5 minutes before cleaning.
It’s very important to pre-treat the stain before attempting to clean it. Remember, pre-treating the stain will lead to better results when using the Bissell Pet Stain Eraser. It will make a world of a difference.
4. Spot cleaning carpet and upholstery
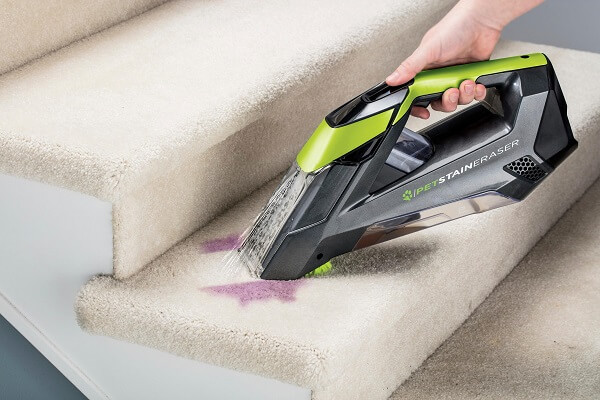
Once the unit is charged and the solution has been added, push the power button to turn the unit on. The battery status lights will illuminate to show how much battery remains. Hold the unit above the soiled surface and press the trigger to spray the cleaning solution.
For stubborn spots, use the brush to scrub the soiled area while continuing to spray the cleaning solution. Press the front of the unit firmly against the surface and pull towards you to remove the cleaning solution.
Be sure to release the trigger for optimal suction.
When cleaning on upholstery, be sure to use the unit vertically upward. Repeat these steps until no dirt or cleaning solution can be removed. Be sure not to overwet an area.
5. Window cleaning (select models)
If your particular Bissell Pet Stain Eraser has the window cleaning feature, you can use it to clean glass and windows. Here are the steps on how to use Bissell Pet Stain Eraser for window cleaning:
- Remove the scrubbing brush by pushing the tab up and pulling gently.
- Attach the window cleaning tool by first securing on the clear nozzle.
- Then rotate the window cleaning tool until it clicks into place.
- Spray window cleaning solution directly on the window.
- Release spray trigger. Use the sponge on the tool to gently scrub.
- Spray trigger still released, tilt cleaner down to engage the squeegee.
- Clean with complete vertical strokes and work across the entire window.
When cleaning, ensure the squeegee is against the window for optimal suction and hold the machine upright. This machine is safe to use with any off-the-shelf ammonia-based window cleaning solutions.
Do not attempt to use any other types of cleaning fluids, such as lemon-based, pine-based, or solvent based cleaning fluids, as it may damage your machine and void your warranty.
Final words
And there you have it, the complete beginner’s manual on how to use the Bissell Pet Stain Eraser. Once you have learned how to use it, you can also learn how to empty it and clean it as well. By taking care of your cleaning machine, it will last a long time and work for many years.

Ryan O'Connor
I write about house cleaning and vacuum cleaners. For me, nothing is more important than a clean environment to ensure both a healthy and happy life. Learn more.

